Help Center · Updated July 2026

Learn BizAssist, one workflow at a time.

Find practical guidance for checkout, inventory, Admin Dashboard, customers, reports, staff access, and business setup across phone and tablet.

Start Here

Profile, taxes, catalog, stock, and staff

Phone

POS, Inventory, Activity, and Manage

Tablet

Dashboard, Inventory, Activity, Users, and Manage

Tablet workspace

Dashboard

Open POS

Side navigation

DashboardInventoryActivityUsersManage

Needs attention

Review low-stock items

Continue in Inventory to check stock and reorder points.

Today at a glance

Daily overview

Recent activity

Traceable changes

On phone, POS stays in the bottom navigation. On tablet, checkout opens from the Top App Bar while management areas stay in the side navigation.

Latest development

What’s new in the current BizAssist experience

These notes distinguish current app behavior from the latest build. Permission-aware or incomplete data is called out clearly.

Compare phone and tablet navigation

Current build · Tablet

Calculator and Today’s insights in tablet POS

Open practical counter tools from the tablet POS header without leaving the selling workspace.

  • Calculator results never add to or change Current Sale.
  • Today’s insights can show register details, today’s sales, and gross profit when your role has report access.
  • Gross profit is withheld when cost or refund coverage is incomplete.

Current build · Tablet

A focused notification preview

The tablet bell previews up to four permitted customer reminders or billing notices.

  • The preview is read-only and follows role permissions.
  • Choose View all to continue in Activity; read, dismiss, and snooze controls are not part of this preview.

Current app · Phone + Tablet

Scanning stays connected to Current Sale

Use Scan Items, then return to the same sale instead of starting over.

  • On tablet, the scan screen includes Back, Scan Items, and Done beneath the shared POS header.
  • View Sale returns to the persistent Current Sale.

Current app · Tablet

Clearer tablet workspace navigation

Management work lives in the side navigation, while checkout opens from the Top App Bar.

  • Use Dashboard, Inventory, Activity, Users, or Manage from the side navigation.
  • Use Open POS to start checkout and Dashboard to return to the management workspace.

Navigation by device

Know where each workspace lives

Phone prioritizes quick counter access in the bottom navigation. Tablet separates management work in the side navigation and checkout in the Top App Bar.

Phone

Bottom navigation

Tap POS in the bottom navigation.

POSInventoryActivityManage

Customer records, reports, personnel, billing, and business setup open from the relevant POS, Activity, or Manage workflow.

Tablet

Side navigation + Top App Bar

Choose Open POS in the Top App Bar.

DashboardInventoryActivityUsersManage

Users is a permission-aware gateway for staff records and roles. Account and Personnel remain the owners of their related changes.

Getting started

Set up the essentials before the first rush

BizAssist works best when business details, checkout settings, catalog records, stock, and staff access are prepared before the first busy selling day.

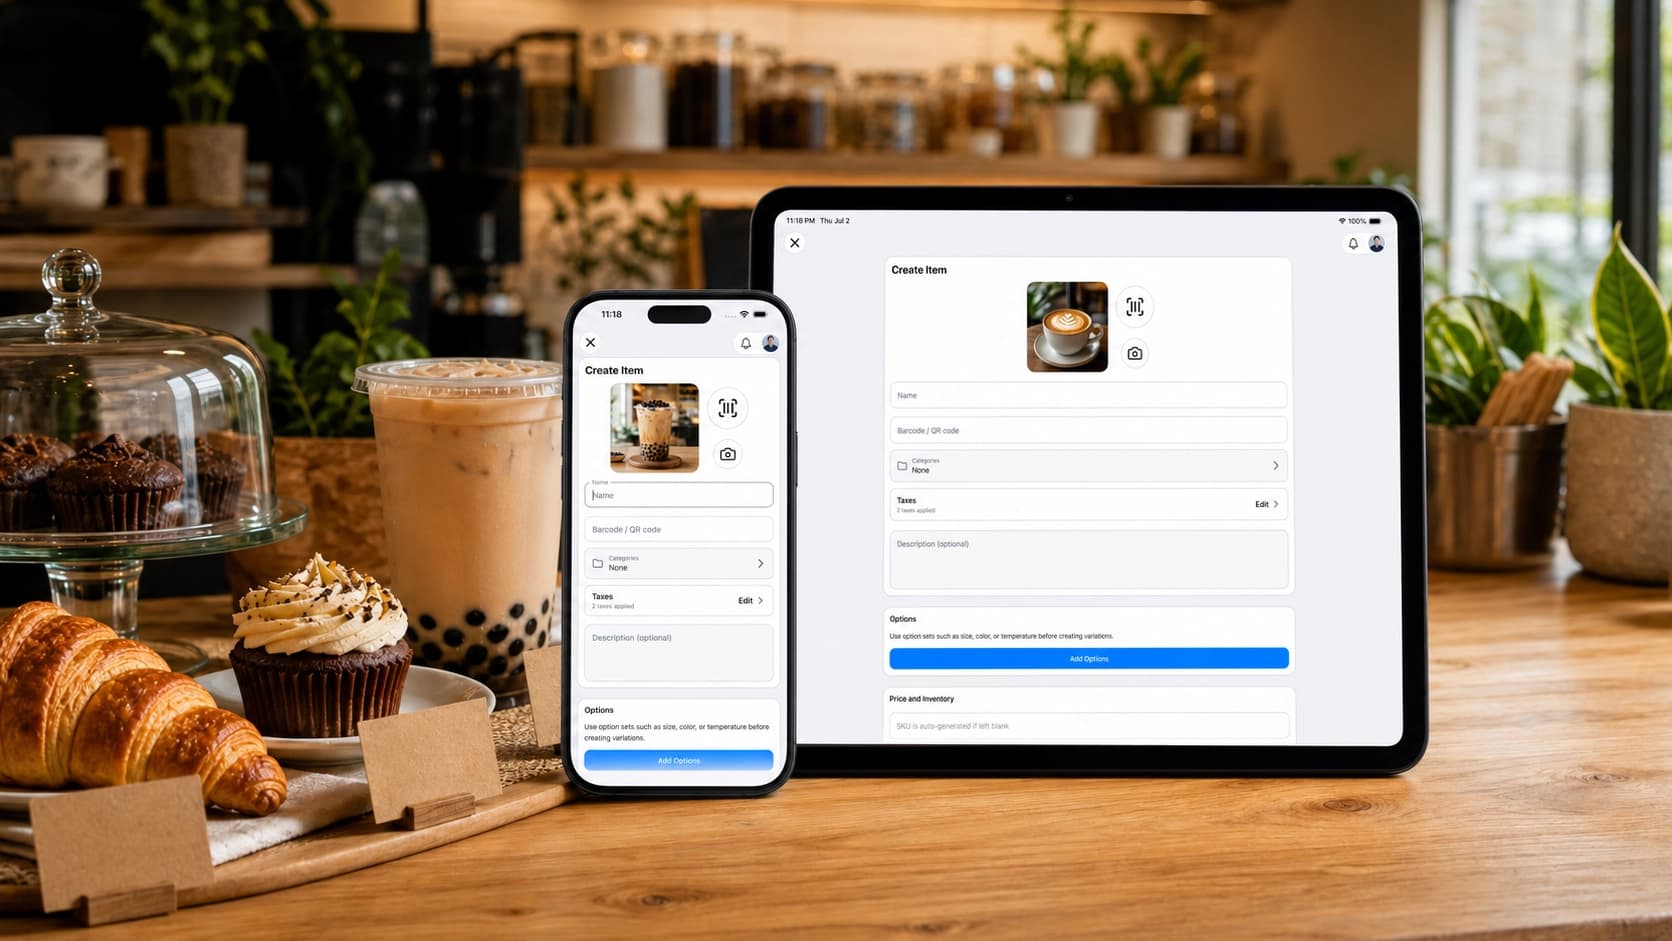
BizAssist Create Item screens on a tablet and phone at a cafe counter.

Catalog setup

Use Create Item to add the details each product needs, including imagery, categories, taxes, options, price, and stock information.

  1. 1

    Verify Account Access

    Create your account, verify your email, and keep password recovery available in case access ever needs to be reset.

  2. 2

    Create or Join the Business

    Owners create the business during setup. Invited staff accept the invitation for the existing business.

  3. 3

    Set Up Business Profile

    Open Manage, then Business Profile. Add the business name, subtitle, logo, backgrounds, and payment QR photo if used.

  4. 4

    Review Admin Dashboard

    Open Admin Dashboard at the start of the day to review needs-attention signals, today’s overview, staff access, and recent activity.

  5. 5

    Configure Checkout Basics

    Open Manage, then Checkout. Set sales taxes and digital payment labels before the first busy selling day.

  6. 6

    Build the Catalog

    Add categories, items, services, units, options, variations, modifiers, discounts, images, and POS tiles.

  7. 7

    Add Stock and Reorder Points

    For tracked items, set initial on-hand quantities and reorder points so low-stock cues become useful.

  8. 8

    Invite Staff

    Open Manage, then Personnel. On tablet, Users provides the permission-aware entry point. Complete invitations and role changes in their owning personnel workflow.

  9. 9

    Run a First Sale

    Open POS, add items or a custom amount, attach a customer if useful, complete payment, and review the result.

Admin Dashboard

Use Admin Dashboard for Daily Review

Admin Dashboard is the daily overview for owners and authorized managers. On tablet, it appears as Dashboard in the side navigation. Use it to identify priority work and open the workflow that owns each change.

Review the Daily OverviewStart the day with a practical view of business operations.Tablet side navigation: Dashboard

What to Review

  1. Open Dashboard before the first selling rush.
  2. Review Needs Attention for setup or operational work that requires follow-up.
  3. Scan Today at a Glance for the current business overview.
  4. Check Team and Access, then review Recent Activity for important changes.
  5. Use the Sales or Finance view when those modes are available to your role.
Use Dashboard Quick ActionsMove from a daily signal to the workflow that owns the work.Admin Dashboard: Quick Actions

Available Shortcuts

  1. Add Product opens the catalog creation workflow.
  2. Adjust Inventory opens stock work in Inventory.
  3. Invite Personnel opens the governed staff invitation flow.
  4. Manage Roles opens role and permission controls when your access allows it.
  5. Business Settings opens the relevant setup controls.
Follow a Daily Review RoutineUse the same practical review sequence each business day.Admin Dashboard and owning workspaces

Daily Steps

  1. Check Needs Attention and low-stock cues before the rush.
  2. Review today’s business overview and recent activity.
  3. Confirm team access still matches each person’s responsibilities.
  4. Choose Open POS in the Top App Bar when the team is ready to sell.
  5. Return to Dashboard for another operational scan, and use Activity or reports for deeper read-only review.
Admin Dashboard FAQAnswer common owner and staff questions.Tablet side navigation: Dashboard

Quick Answers

  1. Who should use Admin Dashboard? Owners and authorized managers who need daily business visibility.
  2. Is Dashboard the same as POS? No. Dashboard is for review and routing; POS is for selling.
  3. Can staff open every shortcut? No. Each destination remains permission-controlled.
  4. Does Dashboard replace reports? No. Reports remains the source for detailed read-only sales review.

POS

POS Help

Use POS for selling, reviewing the current sale, recording payment, printing or emailing sales receipts, and reviewing completed transactions.

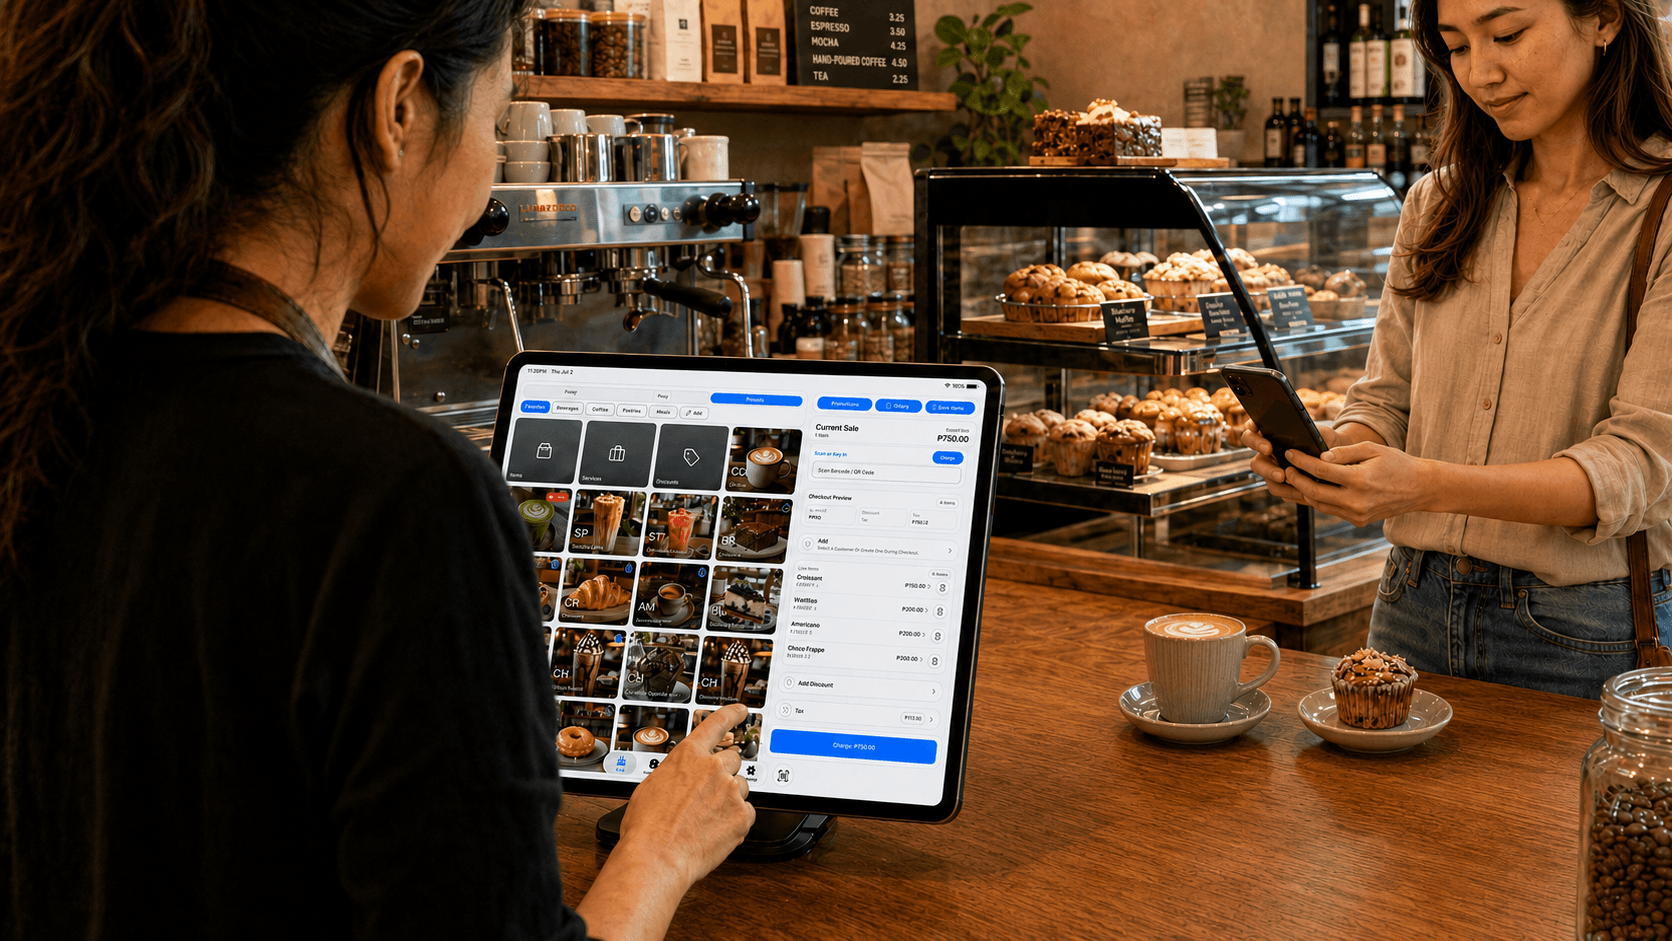
Cashier using BizAssist POS on a tablet while serving a customer at a cafe counter.

Counter checkout

Select items and review Current Sale at the counter before choosing Charge.

Open POSStart selling from the checkout workspace.Phone: bottom navigation · Tablet: Top App Bar

How to use it

  1. On phone, tap POS in the bottom navigation.
  2. On tablet, choose Open POS in the Top App Bar.
  3. Use Keypad for a custom amount, Library for catalog items and services, or Favorites for common choices.
  4. On tablet, review the Current Sale panel while adding items from the left side.
  5. Choose Dashboard to return from tablet POS to the management workspace.
  6. Use Charge only after the sale looks correct.
Use Tablet POS Header ToolsCheck practical counter information without changing the active sale.Tablet POS: Calculator and Today’s insights

How to use it

  1. Open Calculator for a quick calculation outside Current Sale.
  2. Close Calculator when finished; its result is never added to the sale.
  3. Open Today’s insights to review register details or today’s sales when your role has report access.
  4. Review gross profit only when the app confirms cost and refund coverage is complete.
Use Keypad for a Custom AmountAdd a sale line when the amount is not already in the catalog.POS: Keypad

How to use it

  1. Open Keypad.
  2. Enter the amount.
  3. Add a note when the line needs context.
  4. Add the amount to Current Sale or continue directly to Charge when appropriate.
Use Library, Search, and ScanFind items or services and add them to the current sale.POS: Library and Scan Items

How to use it

  1. Open Library.
  2. Search by name or browse items and services.
  3. Use Scan Items when a product has a barcode.
  4. On tablet, use Back, Scan Items, and Done beneath the shared POS header while scanning.
  5. If the item needs options, variations, modifiers, or a variable price, finish the configuration screen.
  6. Choose View Sale or Done and confirm the line appears in the same Current Sale.
Use Favorites BoardsKeep common items, services, categories, and discounts close to the cashier.POS: Favorites

How to use it

  1. Open Favorites.
  2. Tap a saved shortcut to add or open the sale action.
  3. Use edit controls to add, rename, archive, or restore favorite boards when allowed.
  4. Keep the default Favorites board for the most common checkout choices.
Review and Edit Current SaleCheck cart lines before payment.POS: Current Sale

How to use it

  1. Open Current Sale or use the tablet right panel.
  2. Review each line, quantity, price, options, modifiers, notes, discounts, taxes, and customer.
  3. Edit quantities or line details where available.
  4. Remove incorrect lines before charging.
  5. Tap Charge when the sale is ready.
Apply Discounts and Attach CustomersAdd sale context before checkout.POS: Current Sale, Discounts, Select Customer

How to use it

  1. Use Discounts to choose an active discount.
  2. Use Select Customer to search or create a customer.
  3. Check the Current Sale summary after adding the discount or customer.
  4. Continue to Charge when the sale context is correct.
Complete PaymentRecord how the customer paid and finish the sale.POS: Charge

How to use it

  1. Tap Charge after reviewing Current Sale.
  2. Choose Cash, Card, Digital Wallet, Check, Gift Card, Other, or Split Amount.
  3. Enter the payment details requested by the selected method.
  4. For split tender, add payment parts until the amount due is covered.
  5. Complete the sale, then choose Print Receipt to open the device print dialog, Email Receipt, or No Receipt.
Review Transactions, Receipts, and RefundsAnswer post-sale questions and handle governed refunds.POS: Transactions

How to use it

  1. Open Transactions from POS.
  2. Select a completed sale.
  3. Review line items, payment details, customer context, receipts, and refund history.
  4. Choose Print Receipt to open an OS-dialog reprint, or send a receipt email when needed.
  5. Start a refund from the transaction detail when the sale is eligible.

Inventory

Inventory Help

Use Inventory to build the sellable catalog, track stock, manage item details, and keep checkout choices accurate.

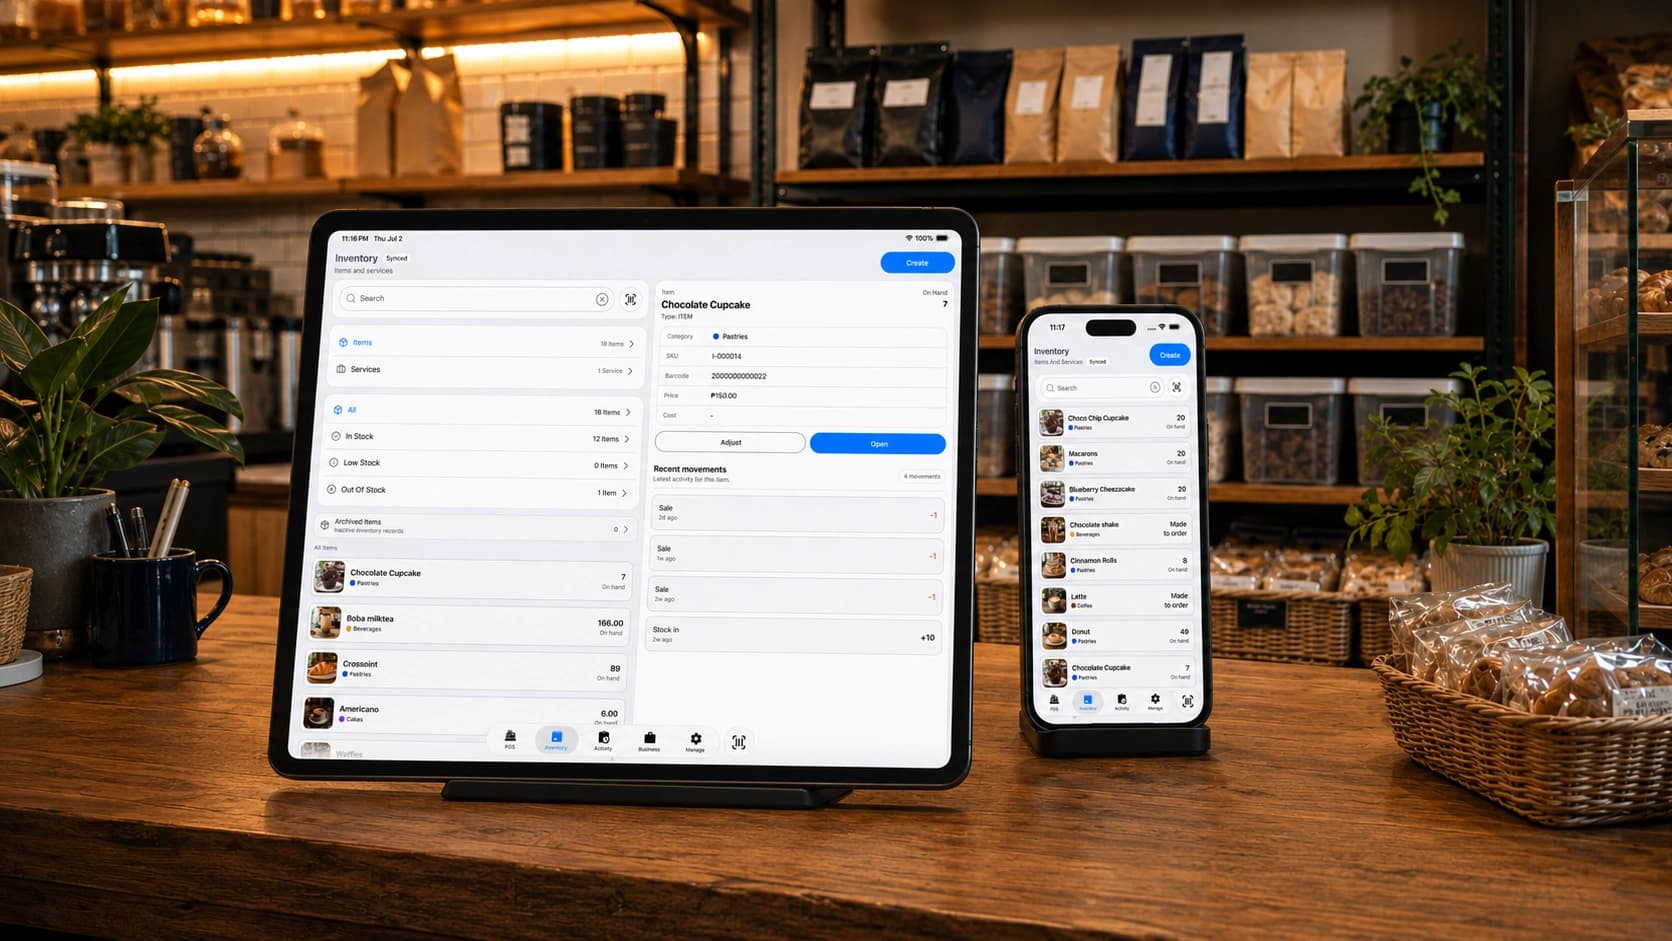
BizAssist Inventory screens on a tablet and phone in a stocked cafe.

Inventory review

Review on-hand quantities, low-stock status, and recent stock movements from the Inventory workspace.

Open and Search InventoryFind items, services, stock signals, and catalog setup areas.Phone bottom navigation or tablet side navigation: Inventory

How to use it

  1. Tap Inventory.
  2. Search for an item or service by name.
  3. Use filters to focus on items, services, low stock, or out-of-stock records.
  4. On tablet, use the separate List or Gallery buttons after Scan and Filter. List is the default full-width record table, while Gallery shows image-first cards. Phone Inventory keeps its existing layout.
  5. Open any tablet row or Gallery card to its dedicated item or service record. Item records include stock actions and recent movements when applicable; service records do not show stock controls.
  6. Use Back to return to Inventory with search, filters, view mode, loaded context, and scroll position restored where supported. Created by identifies the creator, while older or inaccessible attribution appears as Unknown or Former user.
Create Items and ServicesAdd sellable products and services to POS.Inventory: Create Item or Create Service

How to use it

  1. Open Inventory and choose Create.
  2. Choose item for physical products or service for non-stock work.
  3. Add name, category, price, tax behavior, unit, image, and POS tile details as needed.
  4. For items, decide whether to track inventory or mark it as made to order.
  5. Save when the required fields are complete.
Set Units, Precision, and CategoriesKeep quantities and organization consistent.Manage: Units, Inventory: Categories

How to use it

  1. Use Manage, then Units, to add or show the units your business uses.
  2. Use Inventory categories to group items and services.
  3. Choose the right unit when creating or editing an item.
  4. Use category filters to keep large catalogs easier to scan.
Use Options, Variations, and ModifiersSell choices such as sizes, colors, add-ons, or service extras.Inventory: Options, Item/Service Setup, Modifiers

How to use it

  1. Create option sets and values when products need variants.
  2. Attach options to an item and create the needed variations.
  3. Use modifiers for add-ons or choices that change the sale line.
  4. Review the item in POS to confirm the right configuration appears at checkout.
Track Stock and Reorder PointsKeep on-hand quantity and restock cues useful.Inventory: Item Create/Edit and Item Detail

How to use it

  1. Turn on inventory tracking for physical items that should count stock.
  2. Set initial on-hand quantity when creating or receiving stock.
  3. Add a reorder point so BizAssist can show low-stock cues.
  4. Use Item Detail to review stock status before making changes.
Adjust StockRecord why stock changed.Inventory: Item Detail, Adjust Stock, Manage Variation Stock

How to use it

  1. Open the item detail.
  2. Use Adjust Stock for simple tracked items.
  3. Use Manage Variation Stock when stock belongs to a variation or option combination.
  4. Choose Stock In, Stock Out, or Adjustment.
  5. Enter the quantity and save while connected.
  6. Review movement history when you need to understand past changes.
Use Product Images and POS TilesMake products easier to recognize.Inventory: Product Photo and POS Tile Screens

How to use it

  1. Open an item or service photo/tile screen.
  2. Choose a photo or tile color.
  3. Crop or adjust the image where the app asks you to.
  4. Save and check the item row or POS tile.

Customers

Customer Help

Use customer tools to keep identity, notes, photos, reminders, and sale context close to checkout.

Add and Search CustomersCreate and maintain customer records.Manage: Customers

How to use it

  1. Open Manage, then Customers.
  2. Search before creating a new customer.
  3. Add customer identity, contact, and business context details.
  4. Open a customer row to review or edit the profile.
Use Customer Profiles in POSAttach useful customer context to a sale.POS: Select Customer and Customer Profile

How to use it

  1. From Current Sale, open Select Customer.
  2. Search or create the customer.
  3. Attach the customer to the sale.
  4. Open customer profile or last visit details when you need more context.
Add Notes, Photos, Reminders, and AvatarsCapture lightweight context for future service.Customer Detail: Notes and Photos, Reminder, Avatar

How to use it

  1. Open a customer detail page.
  2. Use Notes and Photos to add service notes or customer photos.
  3. Add a reminder date when follow-up is needed.
  4. Use avatar crop when the customer needs a clear identity image.
  5. Review due reminders from Activity notifications.

Activity

Activity and Reports Help

Use Activity and reports for read-only visibility into the day, stock signals, reminders, sales, and transactions.

Read the Activity DashboardSee the day at a glance.Phone bottom navigation · Tablet side navigation: Activity

How to use it

  1. Open Activity.
  2. Review Today's Priority Snapshot.
  3. Check Sales Summary for sales, orders, items sold, and refunds.
  4. Check Inventory Health for low-stock or out-of-stock signals.
  5. Review recent inventory activity and customer reminders.
Use Notifications and Customer RemindersPreview permitted reminders or billing notices, then continue in Activity.Tablet bell preview and Activity

How to use it

  1. Choose the bell on tablet to preview up to four permitted due customer reminders or billing notices.
  2. Choose View all to open Activity for the complete permitted list.
  3. Open a customer reminder to continue in the related customer workflow.
  4. Complete or update the note from the customer flow when finished.
Open Sales ReportReview sales performance for a period.Activity: Sales Report or Manage: Reports

How to use it

  1. Open Sales Report from Activity or Manage, then Reports.
  2. Review totals, payment mix, sales trend, top items, and related report sections.
  3. Use customize when you need a supported same-day time range.
  4. Use email action when you need to send the report summary.
Use End-of-Day SummaryReview the selling day in one read-only summary.Activity: End-of-Day Summary or Manage: Reports

How to use it

  1. Open End-of-Day Summary.
  2. Review daily totals and payment details.
  3. Send the summary email when needed.
  4. Use Transactions for sale-level follow-up.

Manage

Manage Help

Use Manage for business setup, checkout settings, customers, reports, staff, account controls, billing, devices, and legal information.

Set Business Profile and AppearanceControl how the business appears in the app and on customer-facing surfaces.Manage: Business Profile, Appearance

How to use it

  1. Open Manage.
  2. Use Business Profile for title, subtitle, logo, backgrounds, logo shape, and payment QR photo.
  3. Use Appearance for display mode, theme, and accent color preferences.
  4. Review Customer Display if you use a customer-facing screen.
Configure Checkout SettingsSet up taxes and digital payment labels before selling.Manage: Checkout

How to use it

  1. Open Manage, then Checkout.
  2. Open Sales taxes to create or update tax records.
  3. Open Digital Payments to manage card and e-wallet labels used during recorded checkout.
  4. Test a sale flow after setup to confirm staff see the expected options.
Manage Account, Devices, and LegalControl personal account details and app information.Manage: Account, Devices, About

How to use it

  1. Open Account to edit profile, update security, switch business, request data export, or start account deletion.
  2. Open Devices to review active device sessions and remove old ones.
  3. Open About for version and legal links.
Invite and Manage StaffControl who can access the business.Phone: Manage, Personnel · Tablet: Users gateway

How to use it

  1. On phone, open Manage, then Personnel. On tablet, open Users to enter the permission-aware staff workspace.
  2. Review current staff and pending actions.
  3. Continue to the owning Personnel flow to invite staff with a role that matches their job.
  4. Open staff detail to update eligible roles, suspend, reactivate, or remove access.
  5. Use Ownership Transfer only when the business owner should change.
Close a BusinessStop active operations for a business when ownership transfer is not desired.Manage: Account Deletion Path or Business Close Screen

How to use it

  1. Start from the account deletion resolution path when sole-owner status blocks deletion.
  2. Choose Close Business if transfer is not desired.
  3. Review eligibility and warnings.
  4. Confirm with owner credentials.

Display

Customer Display Help

Use Customer Display to show a read-only, customer-facing view of the active sale at the counter.

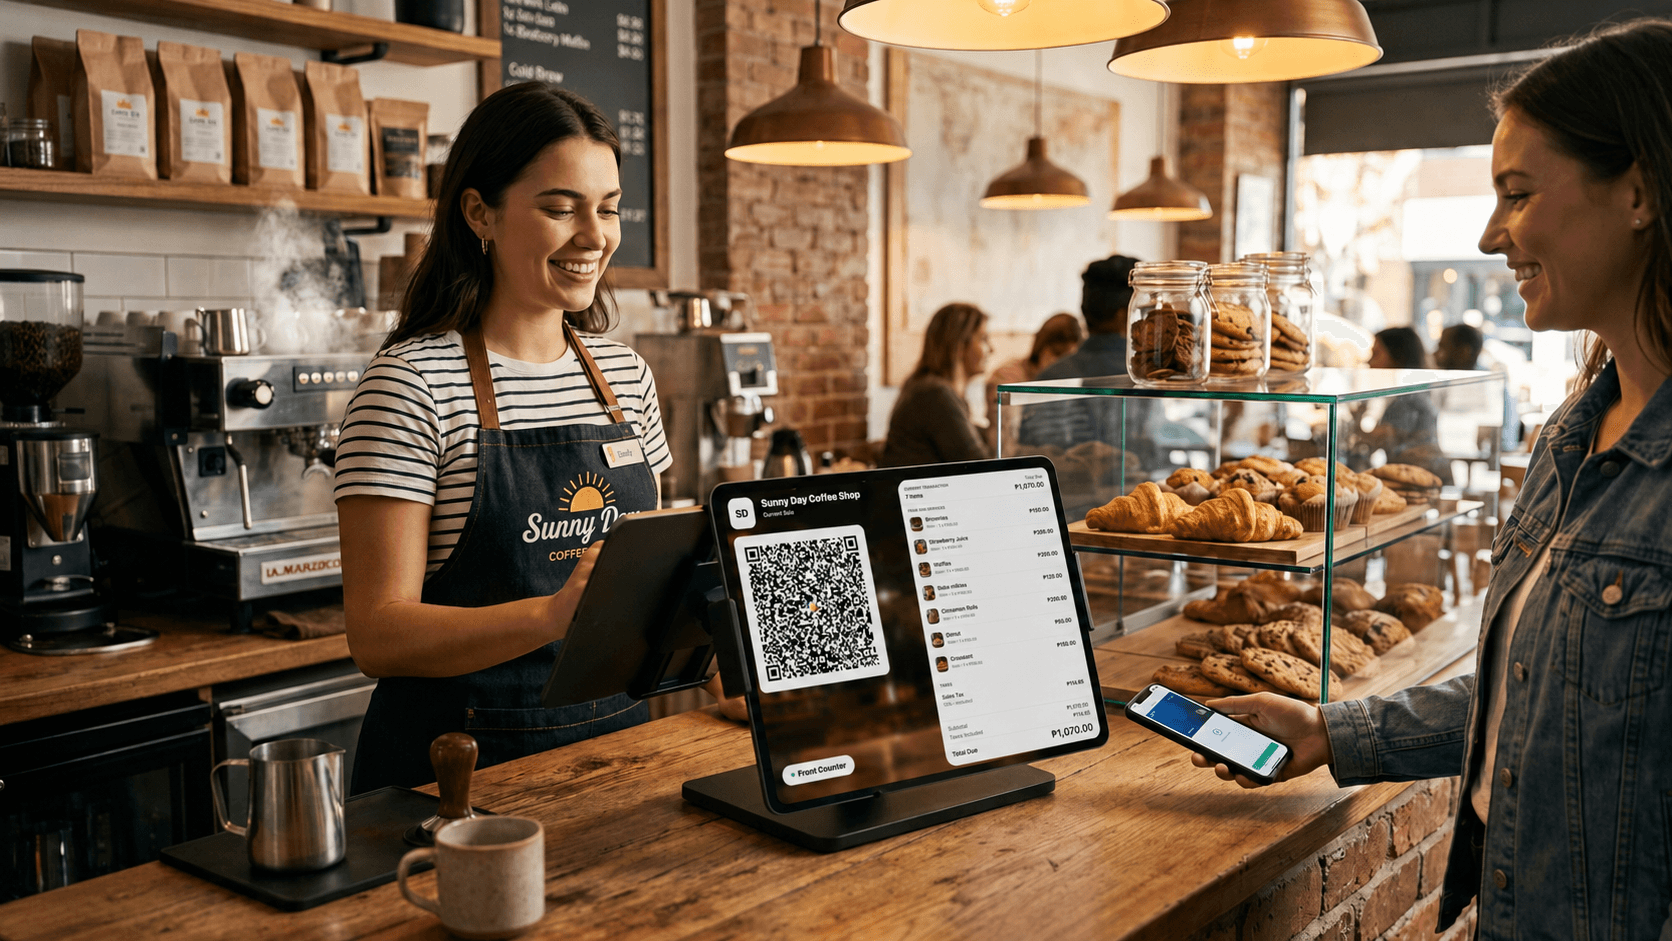
Customer-facing BizAssist display at a cafe showing an active sale, total, and scan-only QR code.

Customer display

The paired display gives customers a read-only view of the active sale and a configured scan-only QR; BizAssist does not confirm payment.

Understand Customer DisplayShow customers the active sale, totals, branding, and payment QR when configured.POS: Display and Manage: Customer Displays

How to use it

  1. Use POS, then Display, to view display status for the selling station.
  2. Use Manage, then Customer Displays, for setup and pairing.
  3. Use the station code on the customer-facing device when pairing is allowed.
  4. Keep selling from POS while the display mirrors the current sale.
Staff POS to Customer Display FlowUse the staff POS as the selling device while the customer-facing screen mirrors the active sale.POS: Display

How to use it

  1. Staff open POS and sell from the assigned station.
  2. The POS station publishes the current sale snapshot while checkout stays on the staff device.
  3. The customer-facing display shows read-only sale lines, totals, branding, station context, and payment QR when configured.
  4. If no staff POS is publishing, the customer display shows waiting or reconnecting status instead of stale totals.
Owner-Only Setup and Staff UseProtect customer display hardware setup.Manage: Customer Displays

How to use it

  1. Business owner opens Manage, then Customer Displays.
  2. Owner pairs or reconnects the display device.
  3. Staff use POS normally after a display is paired.
  4. If staff see setup guidance, ask the owner to pair the display from Manage.
Customize Display BrandingControl the logo, store name, cover background, and payment QR shown on customer-facing display surfaces.Manage: Business Profile

How to use it

  1. Owner opens Business Profile.
  2. Update the business name, subtitle, logo, horizontal background, vertical background, or payment QR photo.
  3. Use Customer Displays to pair or reconnect the display device for the station.
  4. Review POS Display status to confirm the paired display is waiting, reconnecting, or showing the current sale.

Billing

Subscription and Plans

BizAssist Pro packages POS, Inventory, Customer Details, and Reporting under one owner-managed plan.

Start or Restart BizAssist ProGive the business active access to paid app areas.Locked-Business Paywall or Manage: Billing

How to use it

  1. Owner opens the paywall or Manage, then Billing.
  2. Choose Monthly or Yearly when plan selection is shown.
  3. Use restore or restart access when returning to a previously subscribed business.
  4. Wait for the app to confirm active access before staff begin paid workflows.
Review Billing StatusUnderstand current subscription access.Manage: Billing

How to use it

  1. Open Manage, then Billing.
  2. Review current plan and access state.
  3. Use supported store management actions when available.
  4. Ask the owner to resolve billing if staff see locked guidance.

Safety

Offline and Safety

BizAssist supports narrow offline checkout continuity while protecting sale, stock, catalog, customer, and account records.

Use Offline Cash Pending SalesFinish cash sales during temporary connection loss.POS While Offline

How to use it

  1. Confirm the device is offline and the sale can be handled as cash.
  2. Build the sale only from available cached details.
  3. Collect cash and record the pending sale.
  4. Reconnect the device.
  5. Review pending transactions if a sale needs attention.
Understand Online-Only SavesKnow why some saves ask you to reconnect.Inventory, Manage, Customers, Media

How to use it

  1. If a setup or stock save says reconnect, do not keep retrying rapidly.
  2. Reconnect to the internet.
  3. Review the screen for any unsaved changes.
  4. Save again after the connection is back.
Use Shared Devices SafelyKeep each user's work separated.Auth and Manage: Devices

How to use it

  1. Log out when finishing on a shared device.
  2. Use Manage, then Devices, to remove old sessions.
  3. When a new user signs in, let the app finish loading before starting work.

Troubleshooting

What to check first

Most issues can be narrowed down by checking connection, role access, setup status, and whether the record is active.

App Is Not Loading

  • Check internet connection.
  • Use Try Again if the app shows a retry screen.
  • If the business is locked, ask the owner to review Billing.
  • If you recently switched users, let the app finish loading before opening work areas.

Sale Did Not Complete

  • Check whether the device is offline.
  • If cash was collected offline, review pending transactions after reconnect.
  • Review stock and required item options if checkout says a line needs attention.
  • Try the payment step again only after the sale looks correct.

Product Is Not Showing in POS

  • Confirm the item or service is active.
  • Check Inventory filters and category assignment.
  • Confirm required variation or option setup is complete.
  • Reconnect if POS says required data is unavailable while offline.

Stock Count Looks Wrong

  • Open the item detail and review stock movement history.
  • Check whether stock belongs to a variation or option combination.
  • Use Stock In, Stock Out, or Adjustment to record the correction while connected.
  • Remember that pending offline cash sales are not final until synced.

Customer Display Will Not Pair

  • Make sure the business owner is doing setup from Manage, then Customer Displays.
  • Confirm the display device uses the current station code.
  • Check whether the station has reached the connected display limit.
  • Reconnect both devices if the display status says reconnecting or offline.

Staff Cannot See a Feature

  • Open Manage, then Personnel, and review the staff role.
  • Cashier access is POS-focused.
  • Staff access includes POS and Inventory.
  • Reports, Manage, Personnel, Billing, and owner-only actions require the right role.

FAQ

Practical answers for owners and staff

Who Is BizAssist For?

BizAssist is for small shops, cafes, service businesses, school supply stores, and similar teams that need POS, inventory, customer context, reporting, and practical store controls.

Can Staff Use BizAssist?

Yes. Owners can invite staff and assign roles. Staff see the areas their role allows, such as POS, Inventory, Reports, or Manage.

Does BizAssist Support Inventory?

Yes. It supports items, services, categories, units, options, variations, modifiers, discounts, stock adjustments, reorder points, low-stock cues, images, and movement history.

Does BizAssist Support Customer Records?

Yes. It supports a customer directory, POS customer lookup, customer attachment, profiles, last-visit context, notes, reminders, photos, and avatars.

Does BizAssist Support Reporting?

Yes. Activity, Sales Report, End-of-Day Summary, and Transactions provide read-only visibility into completed sales and daily operations.

Does BizAssist Support Customer Display?

Yes. Customer Display can show a read-only active-sale view with branding, line items, totals, customer identity, and payment QR when configured. Owner-only setup is managed from Manage.

Where Do Restaurant Workflows Live?

Restaurant tables and kitchen workflows are not part of the base BizAssist POS workspace. They belong to the separate, optional Restaurant Ops module when that module is included for the business.

Does BizAssist Process Card or Digital Wallet Payments?

No. BizAssist records how a sale was paid. Card, digital wallet, check, gift card, and other methods do not authorize, deposit, or settle funds through BizAssist.

What Works Offline?

Offline support is limited to cash pending sales from available cached sale details. Setup changes, stock changes, customer changes, refunds, media uploads, non-cash payments, and split tender require connection.

Can I Print a Sales Receipt?

Yes. For a finalized sale, choose Print Receipt on the Receipt screen or Transaction Detail to open the device OS print dialog. Current print actions use an 80mm receipt layout. BizAssist does not configure a printer or confirm physical output. On iOS, dismissing the dialog before printing shows “Printing cancelled” as information, not an error. “Print dialog opened” confirms only that the system dialog appeared, not that paper output completed.

What Is Not Included Today?

Base BizAssist POS does not process payments or provide accounting, payroll, tax filing, CRM automation, direct printer setup, SMS receipts, scheduled reports, or report exports. Restaurant tables and kitchen workflows belong to the separate optional Restaurant Ops module. Finalized sales can use the device OS print dialog.
Scope boundaries

Know what base BizAssist POS does not own

These boundaries keep payment, accounting, hardware, offline, and optional module expectations clear.

  • Payment processing, deposits, payout, or settlement handling.
  • Offline non-cash checkout, offline split tender, offline refunds, or offline stock changes.
  • Accounting, payroll, tax filing, or cash drawer close.
  • Restaurant tables and kitchen work belong to the optional Restaurant Ops module, not base POS.
  • CRM automation such as campaigns, pipelines, loyalty programs, messaging, or automated marketing.
  • Direct printer setup or Bluetooth/LAN/USB printer transports, SMS receipts, scheduled reports, saved report snapshots, or report export. Finalized sales can use the OS print dialog.